Showing posts with label AVR. Show all posts

Atmel AVR Studio - Download and Install

By // 2 comments:
In the previous article, we learn why AVR microcontrollers are so popular for designing embedded system projects. We have got the basic knowledge of ATmega16 Pin description and other required data through its datasheet. Now we can move forward to code our microcontroller. So In this article, we are going to install and setup the Atmel studio.
installing atmel studio
 Source: ATMEL

HOW TO INSTALL ATMEL STUDIO 


Those who have been using an earlier version of Atmel studio can realize that there are not so much difference between the new version of Atmel studio except the awesome UI. To download the atmel studio first you have to go to the atmel website or simply click here. There you may see two option for downloading atmel studio like this:
Software                   Description
    
     1                          Atmel studio (latest version name) eg. Atmel studio 7.0 (build 634) web installer                                   (recommended)
                                  2.38 MB, Required internet access during installation 

     2                          Atmel studio 7.0 (build 634) offline installer 
                                 734 MB, No internet access required during installation

Click any one option that you want to install and register your email id as a guest user or create an atmel account. Now go to your email account and click on the download link send by atmel.
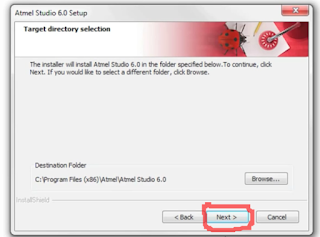
After downloading is completed then double-click on the installation file to install atmel studio. If you have got already installed Visual Studio then it will not install or if you do not have visual studio install on your desktop then first it install it.  Now you just click on next button till installation won't be finished.
When visual studio installation is completed then it installs atmel studio.Accept the terms of the license and click next.
installing atmet studio
Now click next once again as shown.
installing atmel studio
Now once again click on next button and installing will start as shown.
installing atmel studio 6
Now wait for a while and  click on finish button in next dialogue box. Now atmel studio installation is completed and atmel studio will be installed on your desktop. 
Now you have successfully completed installation of atmel studio and ready to code your AVR microcontroller. In the next article, we set up the atmel studio to write our first code for AVR  microcontroller. Hope you like this article and if you have got any problem then comment below.

AVR Microcontroller ATmega16 - An Introduction

By // 20 comments:
ATMEL AVR microcontrollers are very popular among Engineers,Students and Hobbyist  for designing mid range embedded system projects. All embedded system needs brain that receives external signal, interprets it and perform a set of task accordingly. AVR microcontroller are best option for this purpose because AVR microcontroller have powerful instruction set and have high speed.In this article we'll discuss the basic  of ATMEL ATmega16 microcontroller.

WHICH AVR I USE 

difference between avr microcontrollers
AVR Features
ATMEL AVR microcontrollers are available in the market in many varieties. But most popular and used AVR microcontrollers are ATmega8, Atmega16 and ATmega32. All these microcontrollers are belongs to ATMEL mega family. There are no difference between avr microcontroller. They only differs in memory size and Price.
Nomenclature of Atmega uCs

atmel avr microcontroller


Atmega16 Pin Configuration

atmega16 pin configuration
Pin Configuration
Pin 10 and 11 : These pins are available for the power supply of uC. Atmega16 works at 5V.

Pin 9 : This pin is used for Reset the uC. It is an active low pin means its gets activated when you give it high signal.

Pin 30 and 32 : Pin 30 is analog Vcc. Atmega16 has features of analog to digital converter. This pin is used to gives power externally to analog circuit. Pin 32 is analog reference pin. This pin is also used for ADC purpose.

Pin 12 and 13 : By default ATmega26 works at 1 MHz internal frequency. We used this pin to connect an external crystal oscillator for getting higher frequency and clock pulses.

Pin 1-8 (PORT B) : These 8 pin of ATmega16 uC are known as PORTB. These pins are I/O pin that means all pins are capable of getting input as well as giving output.

Pin 33-40(PORT A) : These pins are known as PORTA. PORTA can be used for ADC purpose. If PORTA is not used for ADC purpose then its serves as 8-bit bidirectional I/O PORT.

Pin 22-29(PORT C) : This is 8-bit bidirectional I/O port known as PORT C. All pins of PORT C have internal pull-up resisters.

Pin 14-21 (PORT D) :
This is also 8-bit bidirectional I/O port with internal pull-up resistors. PORTD also has some additional features for serial communication, interprets, PWM and timer.

Datasheet: 

Now we have got some basic knowledge about Atmega16 uC. If you want to learn anything else about the ATmega16 uC then you can refer to its Datasheet. Datasheet contains all the information about uC like its behavior,bit setting, actual working etc.